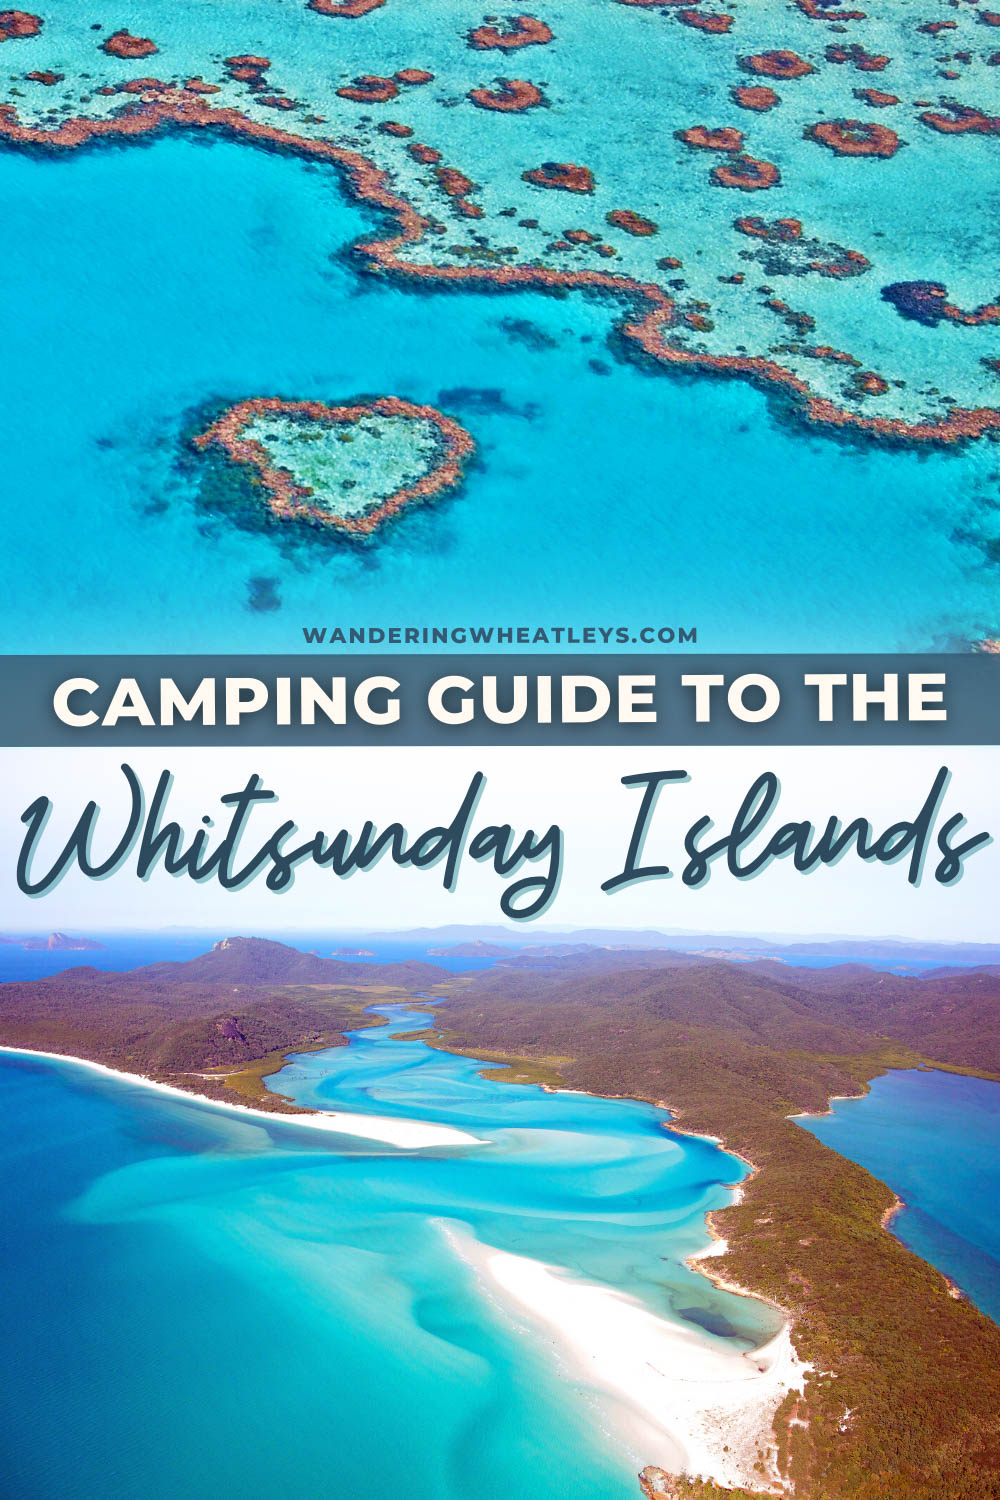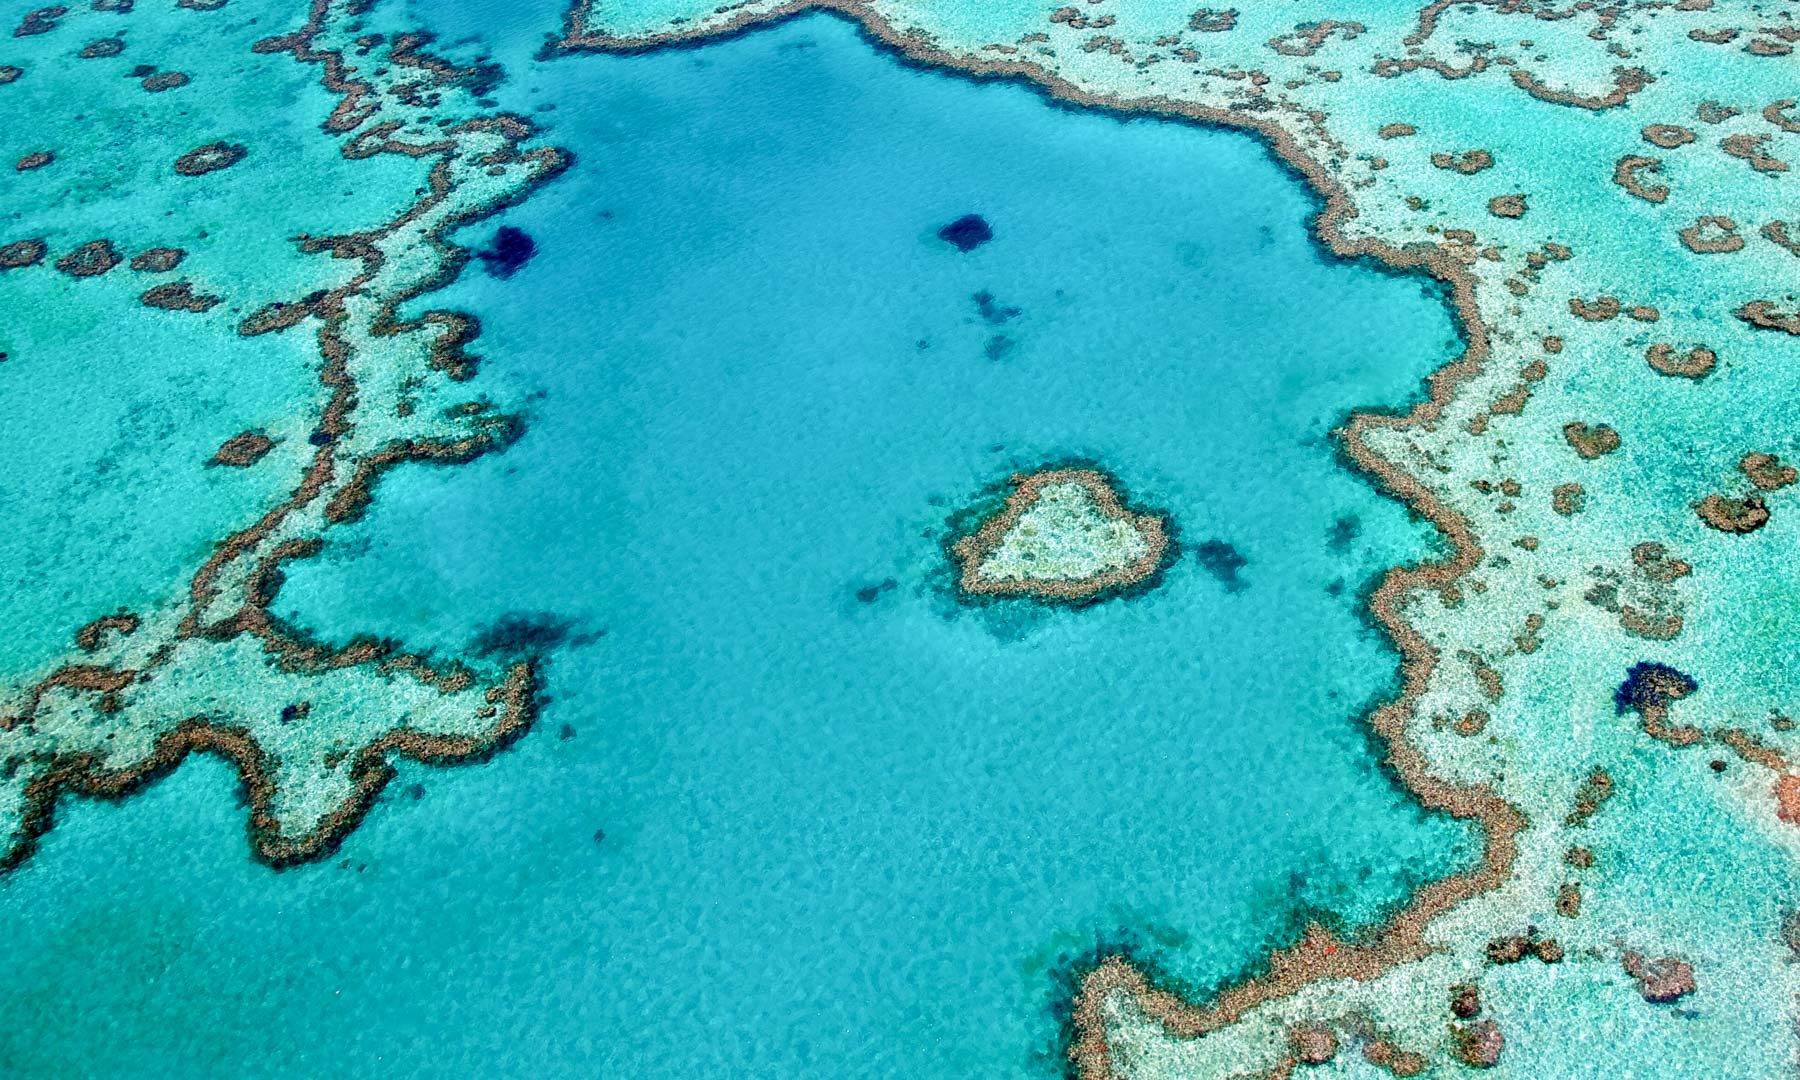

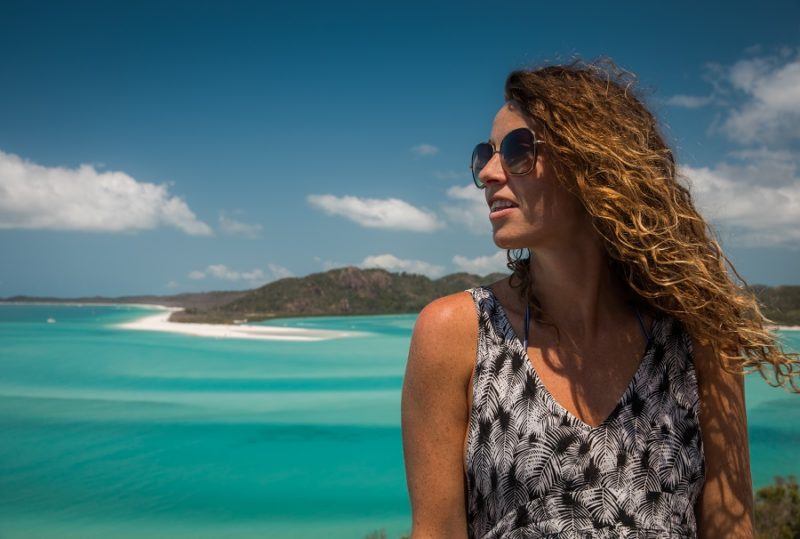
The Whitsundays Islands are one of the most beautiful places we visited during our three months in Australia. The water is a perfect bright blue and the sand is like flour.
There are two ways to visit the Whitsundays without a private boat – take a day tour or go camping. Camping at the Whitsundays is the perfect way to miss some of the crowds.
Waking up on Whitehaven Beach is a dream. Every day we had the beach to ourselves until the tours came through. We stayed three nights, and it was absolutely perfect. Whitehaven beach camping is the way to go to have a more intimate experience.
Content and photographs provided by Yana Kogan and Timon.
Disclaimer: This post may contain affiliate links. If you make a purchase or booking through one of our links we may earn a small commission (don’t worry, it’s at no extra cost to you).
When to Go Camping on the Whitsundays
While the beach looks perfect year-round, Queensland gets hit with rain and jellyfish between the months of November and May. It is best to go camping when it is not the wet season. During this time the hot humid days, rain, and jellyfish take over the tropical north of Queensland.
Which Beaches Have Camping?
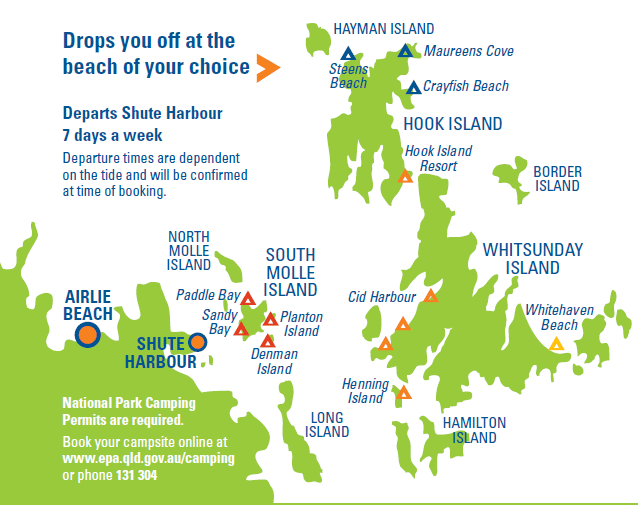
There are three islands that have campsites. Whitsunday Island has six campsites, Hook Island has four campsites, and Henning Island has one campsite. Whitehaven beach is one of the campsites and is a very popular location, so book ahead during holidays and school breaks.
Map of Whitsunday Island Campsites
How to Book Whitsunday Island Camping
Scamper is the only company shuttling campers. Campsite permits and boat transportation need to be booked separately. It is important to first book transportation to ensure availability, and then book a permit online. Scamper can be booked by calling 0487 226 737.
Scamper rents out full gear (tent, mattresses, stove, fuel, cutlery, 50L esky, and torchlight) for $60 the first night and $25 each subsequent night. Water and large plastic bins are provided by Scamper for your stay. Ice is available for $5 per bag at the harbor.
Listed below are the prices for round trip transfer in AUD and all prices are in AUD:
| Cairns Beach, Whitsunday Island | $155 per person |
| Chance Bay, Whitsunday Island | $155 per person |
| Dugong Beach, Whitsunday Island | $105 per person |
| Joes Beach, Whitsunday Island | $105 per person |
| Nari’s Beach, Whitsunday Island | $105 per person |
| Whitehaven Beach, Whitsunday Island | $155 per person |
| Crayfish Beach, Hook Island | $160 per person |
| Curlew Beach, Hook Island | $160 per person |
| Maureen’s Cove, Hook Island | $160 per person |
| Steens Beach, Hook Island | $160 per person |
| Northern Spit, Henning Island | $105 per person |
Campsite Costs
Camping costs are $6.85 for each adult and $27.40 for a family per night. Families are considered two adults and up to five children under the age of 18. Not a bad price to wake up to these beautiful views. For more information on camping check out the Queensland National Park website.
Departure and Parking Information
Parking is available at the Shute Harbour Marina. Parking is free, but space is limited so get there early to secure a spot. The departure time depends on the tide and leaves between 8 am and 1 pm.
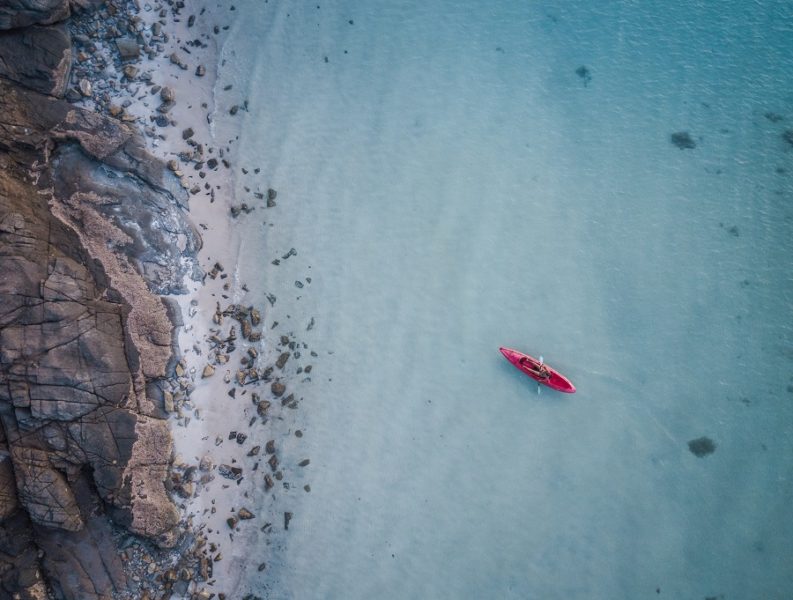
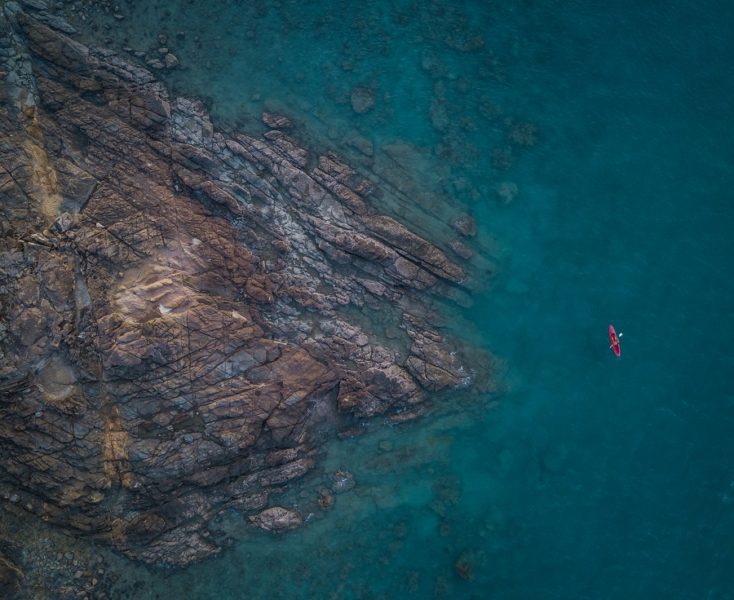
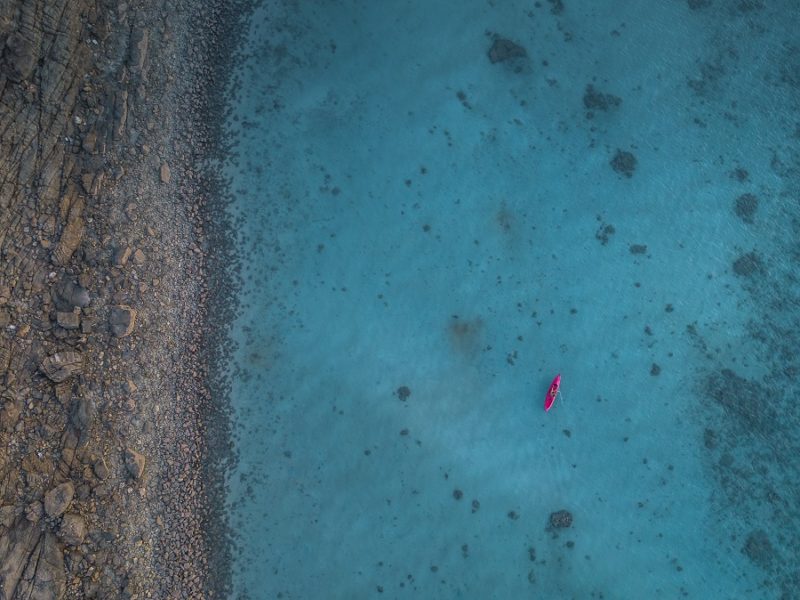
Renting a Kayak for the Whitsunday Islands
Located just beside the Scamper office is Salty Dog Sea Kayaks. They rent open-top kayaks and closed sea kayaks. Open-top kayaks are great for those staying at one campsite, but looking to explore the area and nearby beaches.
If looking for a bigger kayaking adventure, you can rent closed sea kayaks, and book different campsites on different islands, kayaking between each destination.
In addition to kayak rentals, Salty Dog rents camping equipment that is sufficient for travel with sea kayaks (small tent, mattress, stove, fuel, cutlery) for $40 the first night, and $20 each subsequent night. Prices for kayaks are:
| Full-Day Price | Four+ Days Rental Price Per Day | |
| Sea Kayak Single | $90 | $80 |
| Sea Kayak Double | $120 | $100 |
| Open Top Kayak Single | $40 | $40 |
| Open Top Kayak Double | $50 | $50 |
Hill Inlet Lookout via Kayak
To see the most popular spot in the Whitsundays, you will have to put your arms to work. The hill inlet lookout is about five miles from the camping area on Whitehaven beach. It’s doable in one day, but it’ll be a scorcher.
Bring lots of water, lunch, sunblock, and something to cover your head, arms, and legs. The adventure is definitely worth it to get that amazing view!
Hill Inlet Lookout via Walking
It is possible to walk across to Hill Inlet during low tide. Be careful and time your crossing carefully as you may get stuck out there. Most likely crossing will involve wading through some water.
It’ll definitely be a long day. It took us two hours to walk from the campsite to the end of the sandbar on Whitehaven Beach (4.3 miles).
Tips and Important Things to Know for Whitsunday Island
- There is little shade at the campsite. The sand is so white that the reflection makes it much stronger. Unless lobster red is your favorite color, cover up and wear a lot of sunscreen. A tarp or sun umbrellas can be super helpful.
- Did I mention the sand is like flour? Although extremely beautiful, you’ll find little mementos of the trip for days, if not weeks later. The sand gets everywhere! Be extra cautious with electronics and food.
- Speaking of food. Scamper kindly provided plastic storage bins to store food. Always keep food and garbage in the plastic bins. Our neighbors left food out one night and were visited by some very noisy guests.
- From November to March, it is recommended to wear stinger suits while in the water to protect against jellyfish. These can be rented from Scamper.
- Water is provided by Scamper. It was enough for cooking and drinking.
- During the day, hundreds of people visit Whitehaven Beach on day trips. There are boats as well as seaplanes. The beach can get crowded and the seaplanes can be noisy. This is a perfect time to get in a kayak and explore the beaches just around the corner!
What to Bring

- Tent: MSR, Big Agnes, and Mountain Hardwear make excellent tents. Our Marmot backpacking tent is amazing.
- Sleeping pad: The simple Therm-a-rest Basecamp Mattress lasts years. None have lasted as long as this one. It’s going on for six years!
- Hammock: ENO Hammock is our favorite travel-friendly hammock
- Mummy liner: Good for the cool evenings (or a light blanket)
- Ground tarp
- Compression Travel pillow
- Sandals/flip-flops: Rainbow sandals
- Torchlight
- Water bottle
- Lighter
- Quick-Dry Pack Towel
- Small first aid kit: Band-aids, alcohol swabs, blister pads, gauze pad, rubber bands, and duct tape all can be very helpful when needed
- Toilet paper
- Sunblock: Alba or Badger make good organic sunblock. Treat your skin well!
- Bug spray: Natrapel DEET free bug spray
- Soap: Dr. Bonner’s Castile Liquid Soap
- Toothbrush/toothpaste
- Deodorant
- Camp stove: JetBoil, MSR Pocket Rocket, or the fuel-efficient MSR Whisperlite International
- Fuel
- Cooking pot/pan, bowls, and a coffee mug: The MSR Alpine set has everything you need!
- Cutlery: MSR makes a great utensil set
- Lightweight clothes during the day
- Bathing suits
- Beach towel or sarong
- A light jacket or long sleeve shirt for evenings
- Camera or GoPro
- Dry bag: Sea to Summit dry sack
Food Recommendations for Camping

Breakfast
- Quick oats with brown sugar
- Scrambled eggs
- Muffins / bagels
- Coffee
Lunch
- Tuna fish sandwiches with hard cheese (i.e Manchego) on a bagel/roll
- Avocado with salt and paprika on bagel/roll with hard cheese
- Peanut butter & jelly sandwiches
Dinner
- Instant meals (i.e. Mountain House or Backpacker’s Pantry organic options)
- Soba noodles with broccoli and soy sauce packets
- Mac & cheese
- Pasta with garlic and oil
- Red lentil curry
Snacks
- Beef jerky
- Gummies
- Protein bars
- Chocolate
- Nuts or trail mix
Spices
- Salt
- Curry powder
- Smoked paprika
That’s it – all you need to know about camping on the Whitsunday Islands! We hope you have a wonderful vacation!
Planning a trip to Australia? Check out our favorite books and travel guides!
SHARE THIS ON PINTEREST